183-Piece Hand-Crank Wooden Film Projector DIY Kit
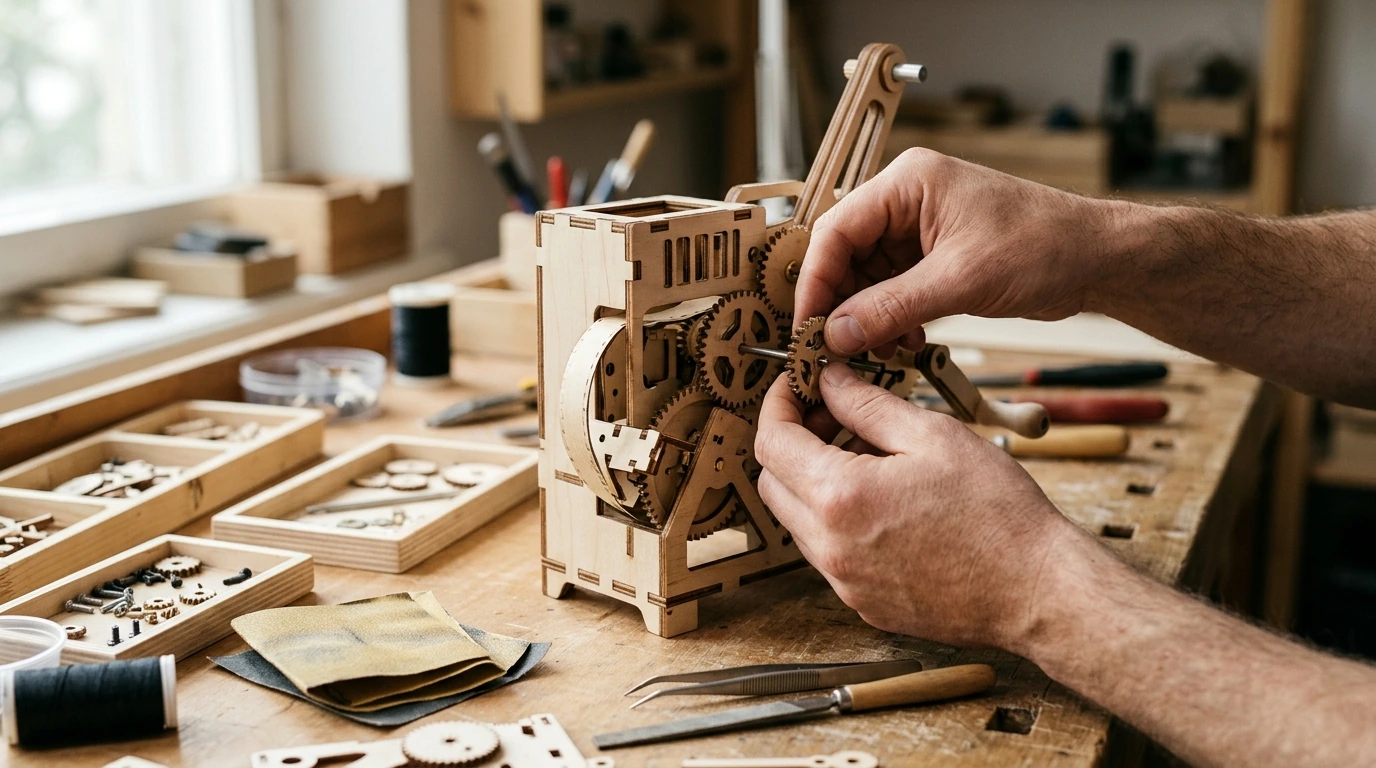
183-Piece DIY 3D Wooden Hand-Crank Film Projector Kit
A hand-crank wooden film projector kit blends puzzle-building with a working mechanical display that nods to early cinema. With 183 precision pieces, this build is designed to be an absorbing weekend project and a conversation-starting desk piece once assembled—no batteries required for the crank-driven motion. If you like the calm focus of hands-on assembly and the payoff of seeing gears and shafts move in sync, this model delivers that satisfying “it actually works” moment.
For a closer look at the kit and current pricing, see the 183-Piece DIY 3D Wooden Hand-Crank Film Projector Kit.
What this kit is and why it’s fun to build
This is a build-it-yourself 3D wooden model that assembles into a film projector-style mechanism driven by a hand crank. The appeal isn’t just the finished look—it’s the process of lining up parts, seating axles, and watching motion transfer through a gear train the first time you turn the handle.
Because it’s crank-powered, the project naturally highlights mechanical basics like alignment, smooth gear meshing, and steady rotational movement. That makes it especially rewarding for tinkerers and puzzle fans who enjoy small, repeatable “progress wins” as subassemblies click into place. And since it’s a wooden display piece when finished, it fits well on shelves, desks, or hobby corners without looking like a toy that needs to be hidden away.
What’s included and what to prepare before starting
The kit includes 183 wooden pieces designed to interlock into the projector body, crank, and internal moving parts. Parts are typically pre-cut, but careful removal and occasional light sanding on tight joints can make the motion noticeably smoother—especially around drivetrain components where friction shows up immediately when you crank.
Before starting, set up a clean, flat workspace with good lighting. A small tray (or two) is helpful for keeping tiny parts from wandering. Patience matters most: you’ll get the best results by test-fitting, confirming gear engagement, and only then pressing pieces fully into place.
Quick build checklist
| Step | What to do | Why it matters |
|---|---|---|
| Sort pieces first | Group similar shapes and small parts in a tray | Reduces mistakes and speeds up assembly |
| Dry-fit moving parts | Test-fit gears and axles before final seating | Prevents binding and uneven crank motion |
| Keep friction low | Lightly sand tight tabs/slots if needed | Improves smoothness and reduces wear |
| Protect the finish | Work on a soft mat or cardboard | Avoids scratches on visible panels |
Optional helpers: fine-grit sandpaper, tweezers for small parts, and wood glue only if the instructions call for it. Avoid over-gluing anything that needs to rotate or slide—glue squeeze-out in a moving interface is a common cause of stiff cranking later.
Build experience: time, difficulty, and common trouble spots
Build time varies by experience and how methodical you are. Many builders prefer splitting the project into multiple short sessions rather than pushing through in one sitting—especially when you reach the drivetrain steps where precision matters.
Difficulty tends to come from alignment. Gears must mesh cleanly, and axles must sit straight to prevent skipping. Common trouble spots include snapping delicate tabs when forcing tight joints, creating too much friction by fully seating parts before confirming movement, and mis-seating shafts that makes the crank feel stiff.
A practical rhythm is to assemble a section, turn the crank gently, listen/feel for resistance, and correct issues immediately while it’s easy to access the mechanism. That habit helps prevent the frustrating situation where the model looks perfect on the outside but binds internally.
How the hand-crank mechanism works (in plain terms)
Small misalignments create friction, and friction shows up as squeaks, stiffness, or jerky motion. The smoothest builds usually share three traits: straight axles, clean gear-tooth engagement (no rubbing against side walls), and restraint with glue so moving parts stay free. If you’re curious about the real-world history behind projector mechanisms, Encyclopaedia Britannica offers a helpful overview of motion-picture camera and projector technology here: https://www.britannica.com/technology/motion-picture-technology.
Who it’s for: gifting and display ideas
If you’re bundling gifts, a distinctive accessory can complement a maker-themed present nicely, such as the Fierce Moissanite Tiger Head Ring for Men or the Elegant Double-Layer Stainless Steel Necklace.
Care, safety, and keeping it running smoothly
If the motion becomes stiff over time, inspect for debris caught in gear teeth and check whether an axle has shifted slightly out of position. A tiny change can increase friction across the whole drivetrain. Also, keep unassembled components stored safely—small parts can pose a choking hazard, and the U.S. Consumer Product Safety Commission provides guidance on small parts hazards here: https://www.cpsc.gov/Safety-Education/Safety-Guides/Children/Choking.
Price and availability snapshot
For gifting, ordering early is smart: allow time for shipping plus build time if you plan to present it assembled. You can check the latest details directly on the 183-Piece DIY 3D Wooden Hand-Crank Film Projector Kit page.
FAQ
Does the projector kit need batteries or electricity?
No. The motion is powered by a hand crank, so it runs mechanically without batteries or a power cord, inspired by classic projector designs.
How long does the build usually take?
Many builders finish in a few hours to a full weekend, depending on experience and how carefully you work. Splitting it into sessions and testing the crank motion as you go helps prevent time-consuming rework.
What should be done if the crank feels stiff or the gears skip?
Check gear alignment and confirm axles are seated straight and fully in their slots. Lightly sand overly tight joints if needed, clear any debris from gear teeth, and avoid getting glue on moving parts where it can add friction.











Leave a comment